How to Install Panel Corners, Step by Step
3 min readLast updated:
A practical guide to fixing panel corners and moldings on a wall: planning, marking, fixing with plug and screw or silicone, then filling and painting, plus common mistakes to avoid.
Installing panel corners takes six stages: planning, marking the wall, preparing the pieces, fixing with plug and screw (or silicone, depending on the design), joining the moldings, and finally filling and painting. The secret to a good result is accuracy in marking before any hole is drilled.
What you need
- Panel corners and matching panel moldings.
- Wall plugs and screws suited to your wall, plus bonding silicone if the design is fixed with it.
- A drill, spirit level (or laser), tape measure and pencil.
- A fine-tooth saw or cutting disc for the moldings.
- Filler, sandpaper and painting tools.
- A dust mask, gloves and eye protection.
Always follow the fixing method in each product description: most of our panel corners use a wall plug and screw, some use bonding silicone, and GRP moldings use silicone or plug and screw.
Step 1: Plan
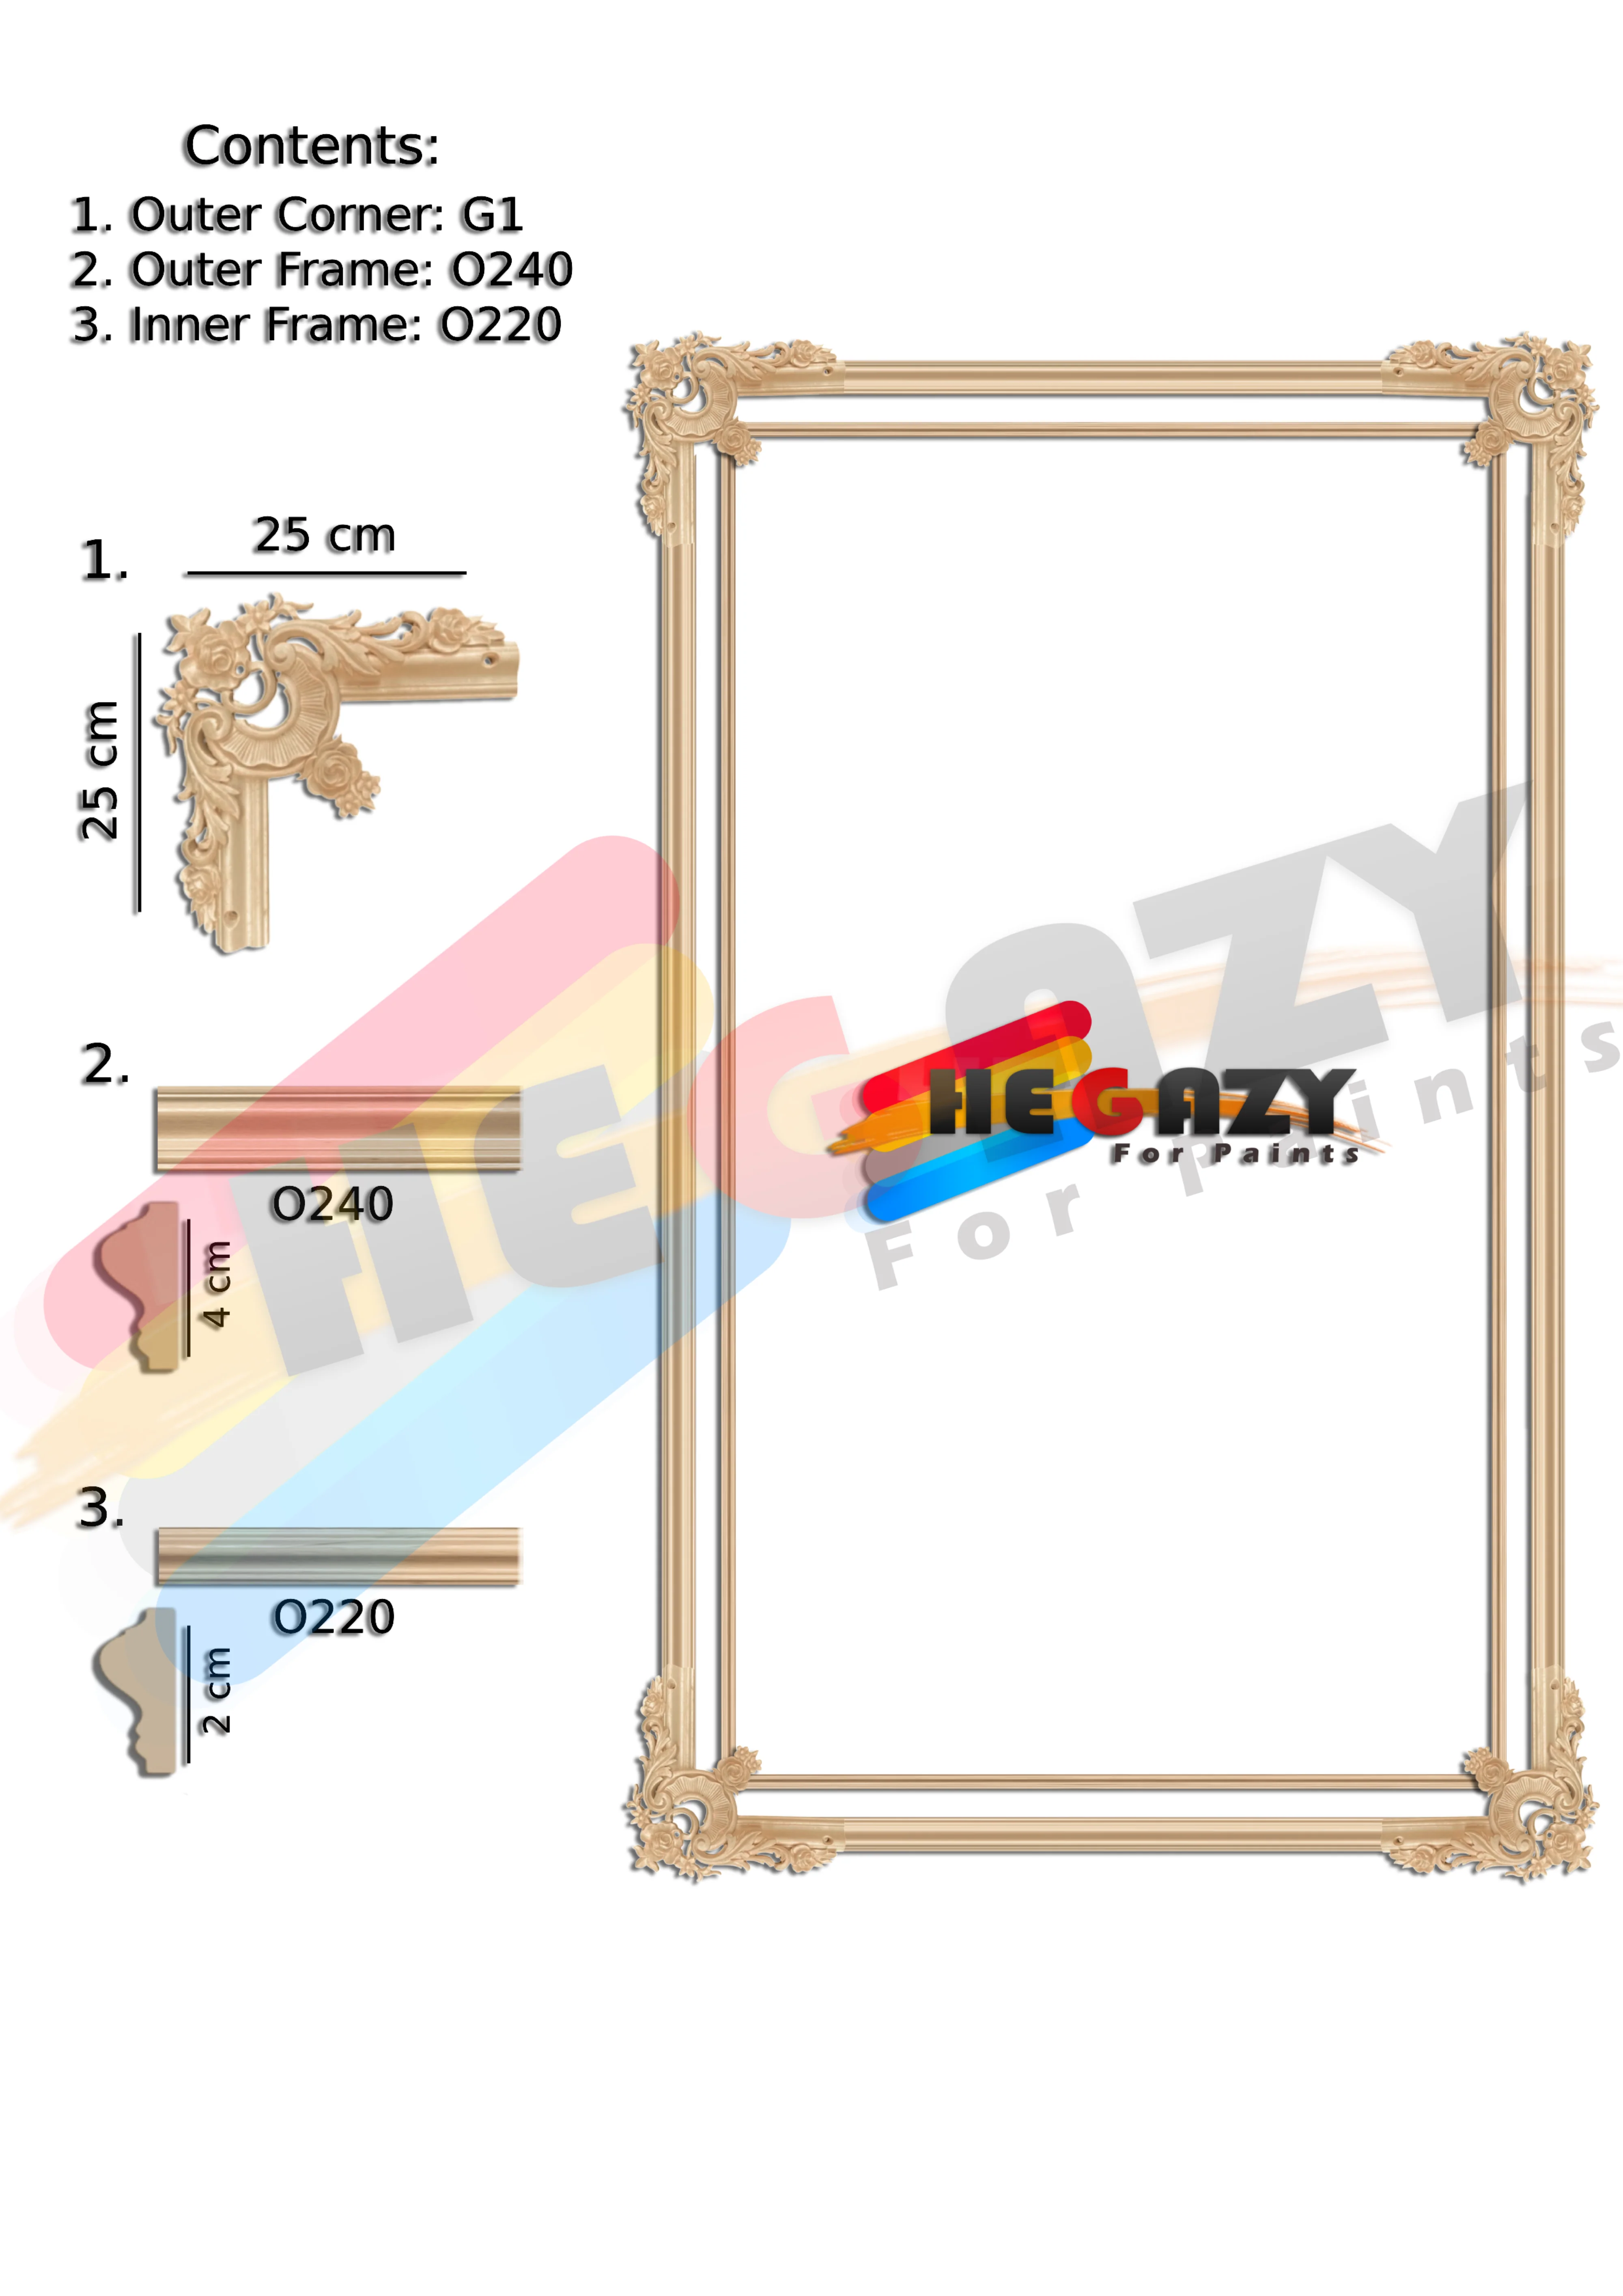
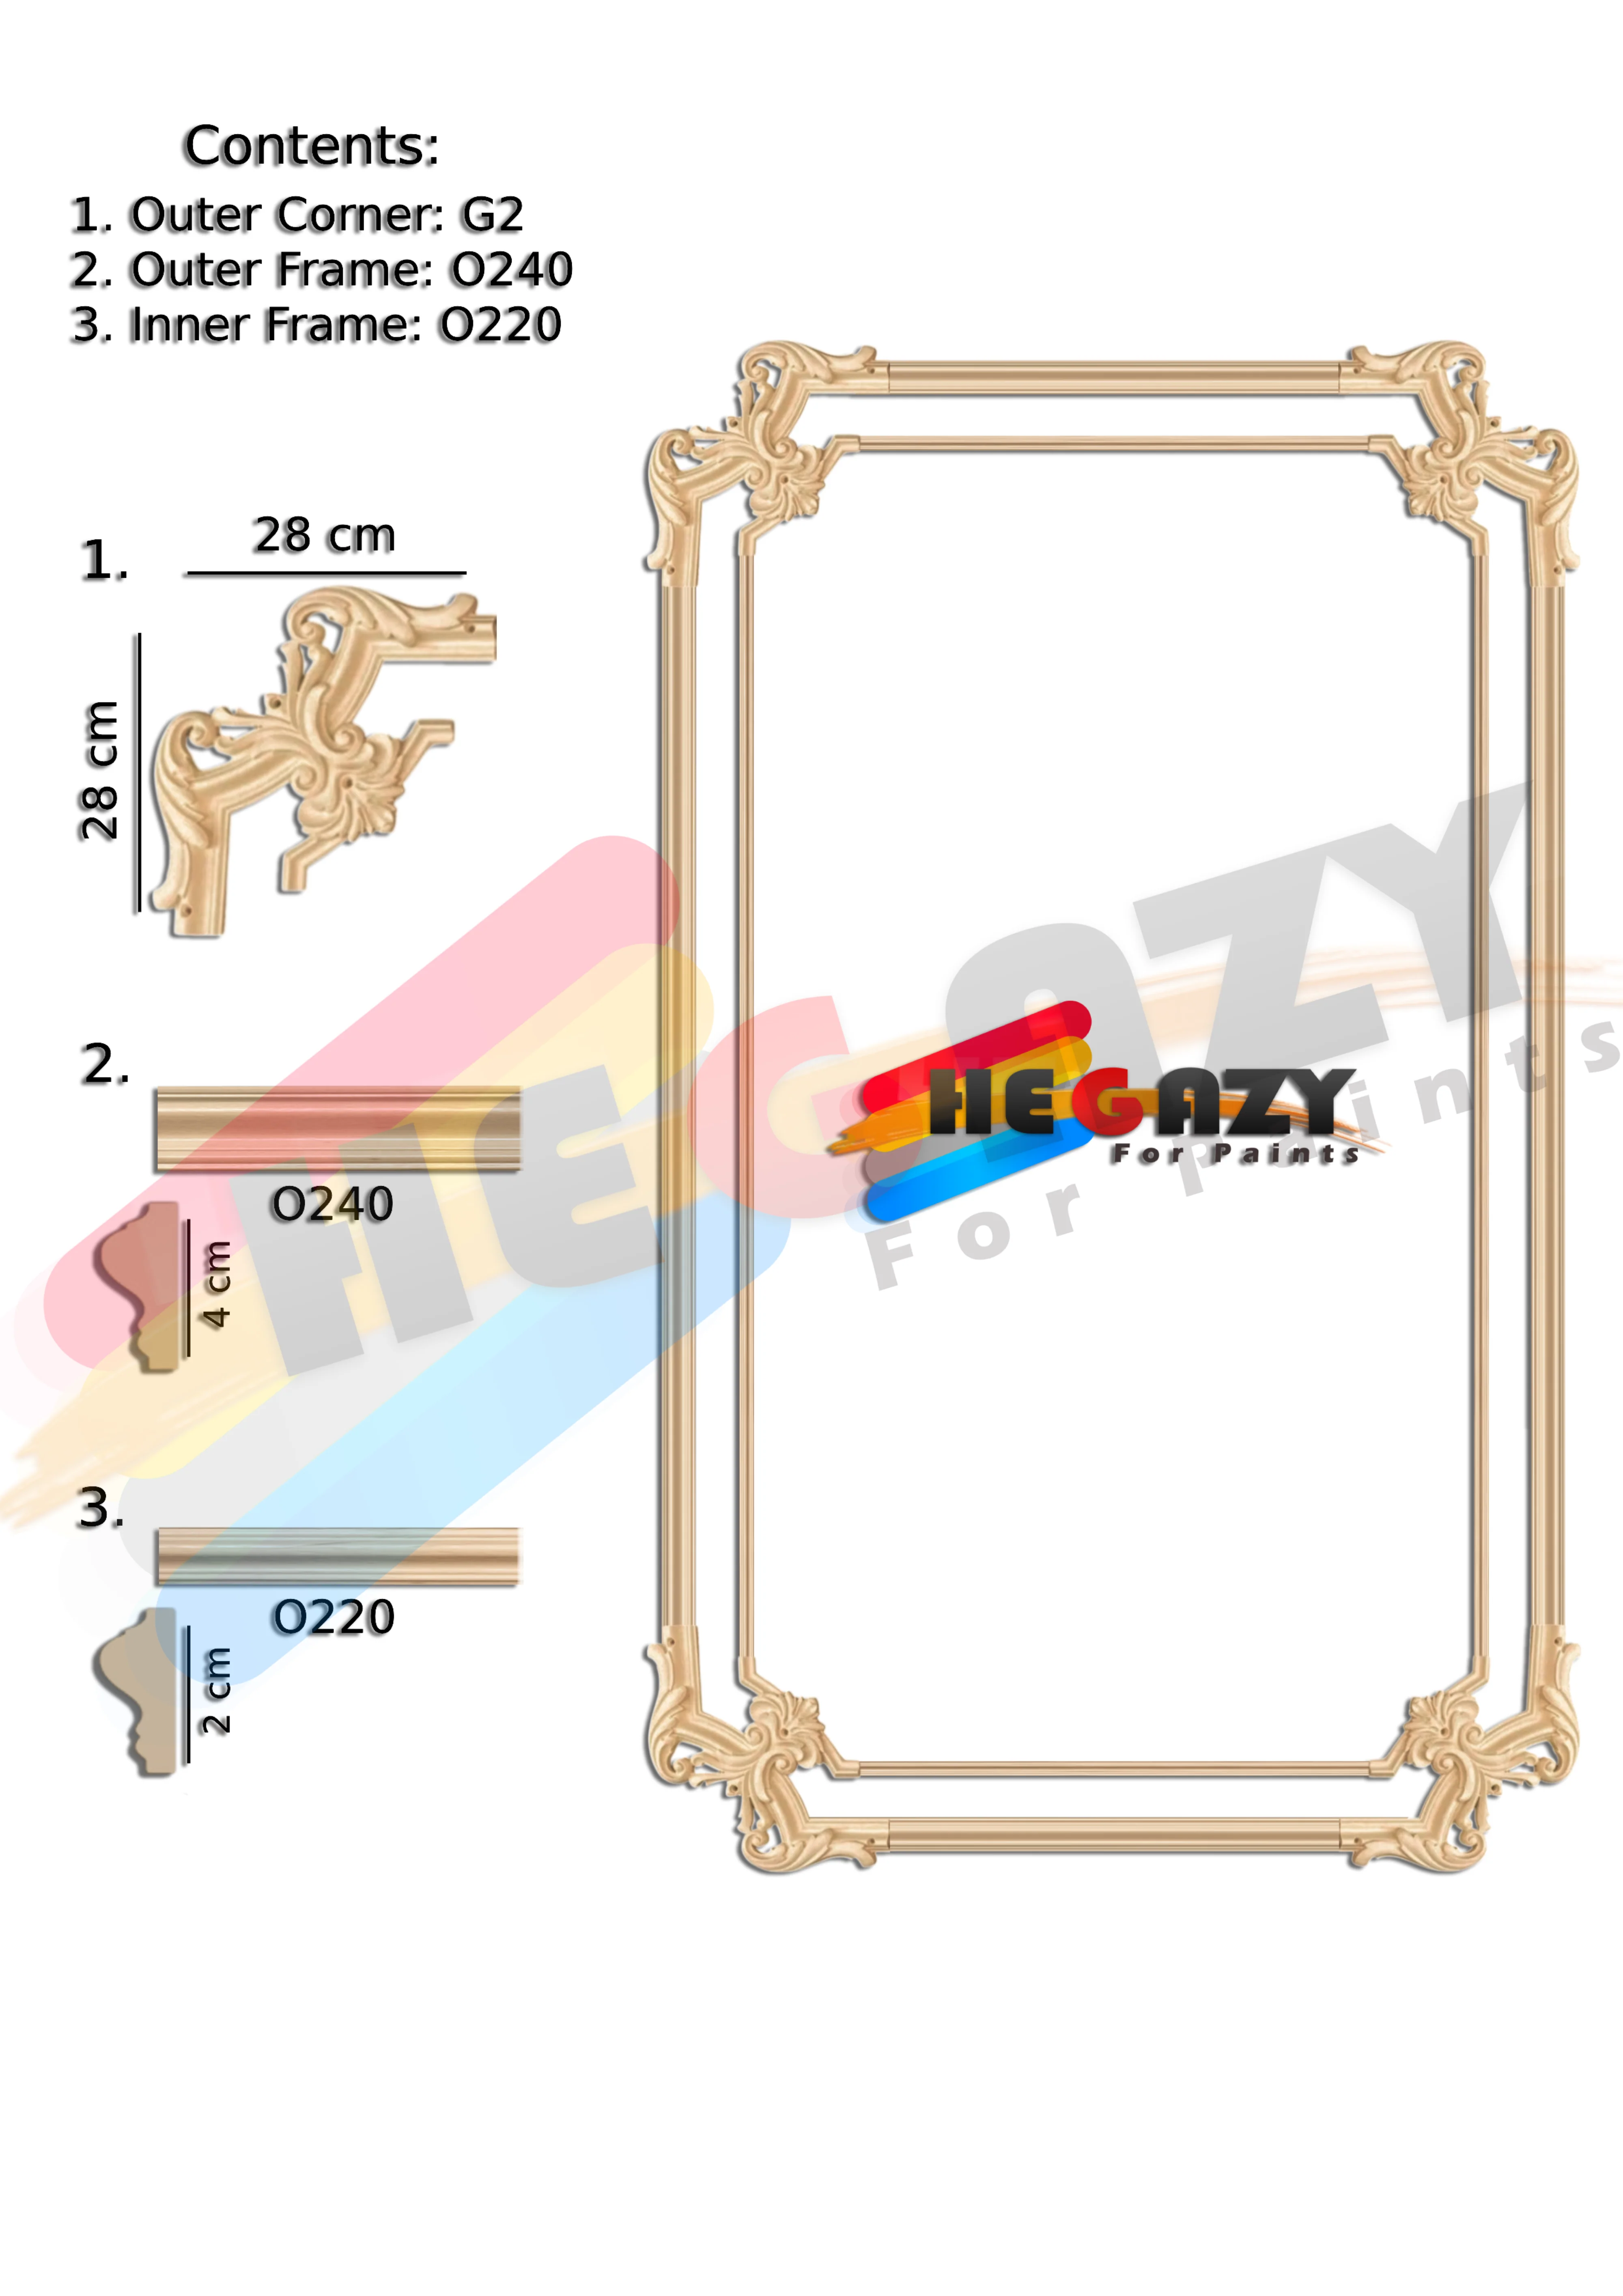
Decide the number of frames, their size and the gap between them. The quantity calculator gives you the number of frames, corner pieces (four per frame) and molding lengths. Sketch the layout on paper first, keep equal gaps between frames and around the wall edges, and line the centre up with a piece of furniture or screen if there is one.
Step 2: Mark the wall
Use the level to draw light pencil lines for each frame, then mark each corner position. Hold a piece on the mark and step back to look before you drill. A marking error repeats in every frame, so check it twice.
Step 3: Prepare the pieces
Dry-fit the pieces on the wall without fixing to confirm that corners and moldings line up. Wipe dust from the back of each piece. If a piece itself needs drilling, use a suitable bit at slow speed so it does not crack, and wear a mask and gloves because fibreglass dust irritates skin and lungs.
Step 4: Fix
Plug and screw: drill the wall with a bit suited to it, insert the plug, then screw the piece without over-tightening. Silicone (where stated): clean the wall, apply beads of silicone to the back, press the piece onto the mark and hold it with temporary tape until the silicone cures according to the tube instructions. Before drilling, make sure there are no pipes or cables behind the spot.
Step 5: Join the moldings
Measure between each pair of corners, transfer it to the molding and cut it with a fine saw or disc while holding it firmly. Keep the cut end square so it meets the corner without a gap, then fix it with silicone or plug and screw as described. Each corner's description lists the matching molding, such as code 0240, code 0220 or any 2 or 4 cm molding.
Step 6: Fill and paint
Fill joints and screw heads, let the filler dry, sand lightly and remove dust. Then paint: the material accepts any paint type such as plastic, glaze and tebtin. See our GRP painting guide for details.
Common mistakes
- Marking without a level, so frames look tilted.
- Skipping the dry fit.
- Using plugs that do not suit the wall type.
- Painting before the joints are filled.
- Ignoring the "interior decor only" note in a product description.
- Cutting moldings without a mask and gloves.
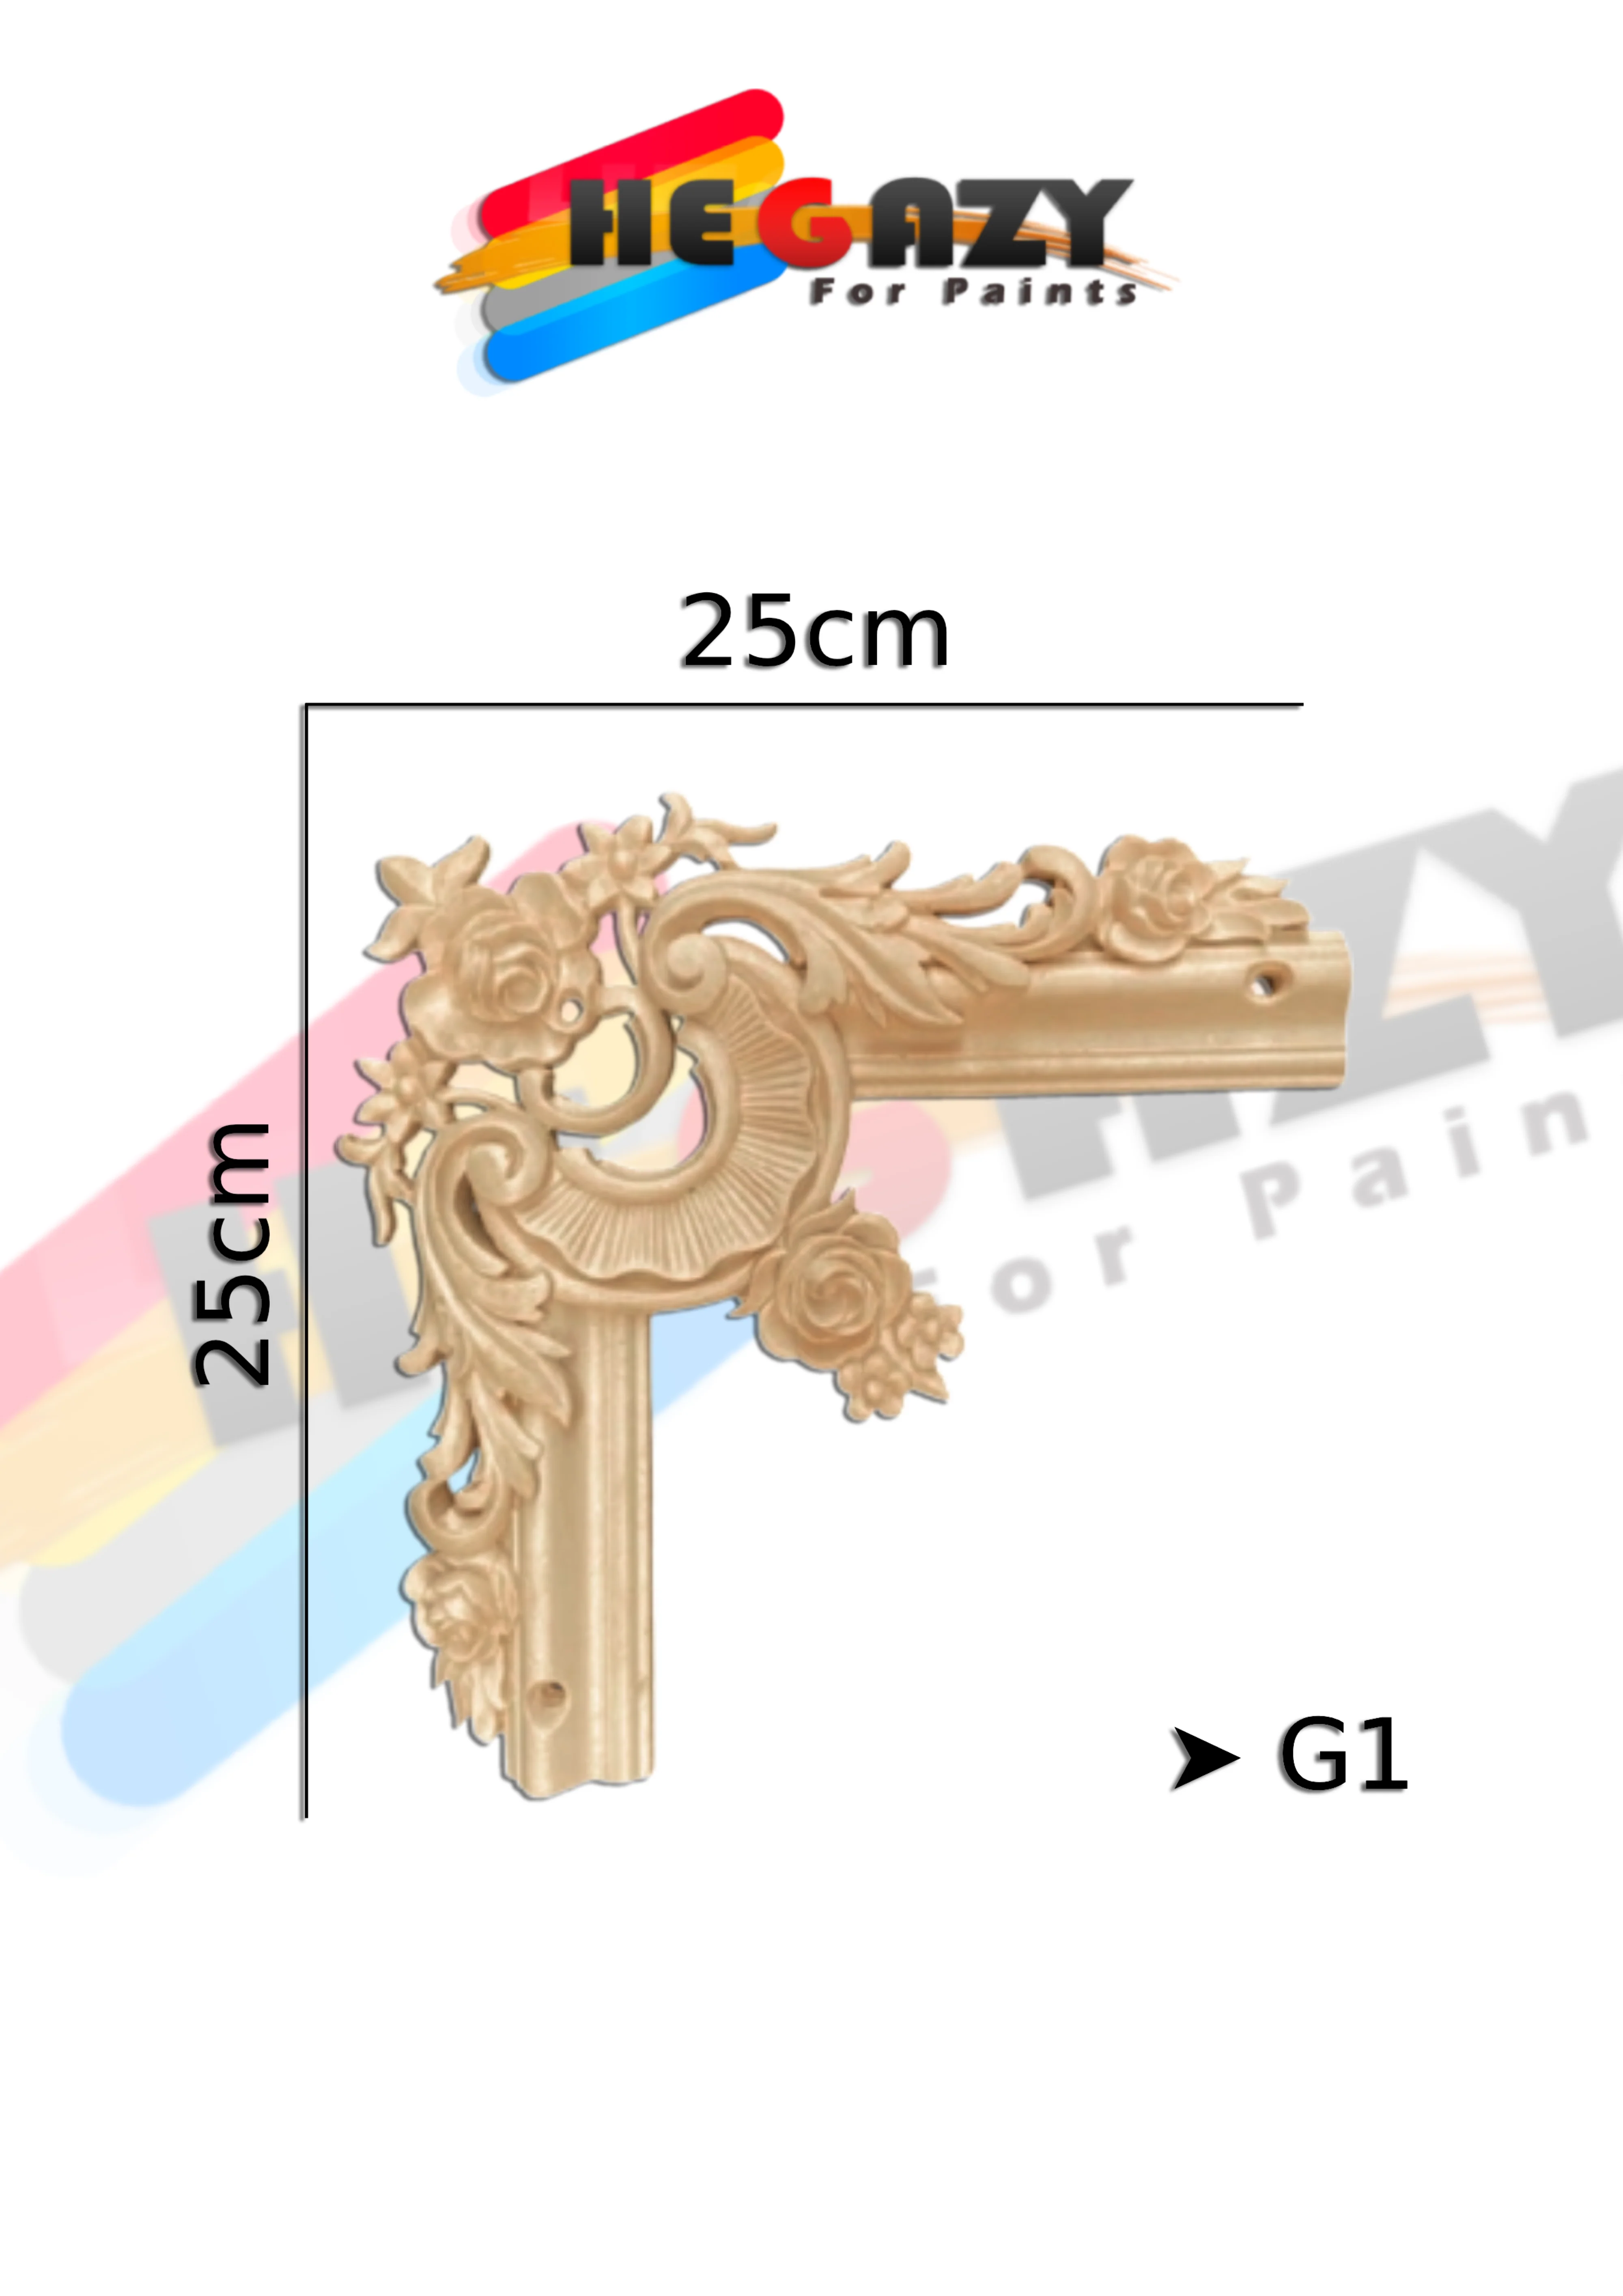
If you are used to hands-on work you can fit a small frame yourself; for large walls and high ceilings a finishing technician is recommended. See corner G1 and molding G240 for sizes.
Frequently asked questions
Should I use plug and screw or silicone?
Follow the fixing method in each product description: most panel corners use a wall plug and screw, and some use bonding silicone.
Should I fix the pieces before or after painting?
It is easiest to fix the pieces first, then fill the joints and paint everything together so the frame looks continuous with no lines between pieces.
Can I install on a painted wall?
Yes, as long as the old paint is firm and not peeling. Clean off dust, and remove any crumbling paint before fixing.
Do I need a technician?
Someone used to hands-on work can fit a small frame alone, but large walls and high ceilings are best left to a finishing technician.